How to Change Your Apple Watch Band:A Quick and Easy Guide
So, you’ve got your Apple Watch, and now you want to switch up its look by changing the band. Fortunately, Apple has streamlined this procedure, making it incredibly simple. In this guide, we’ll walk you through the simple steps to change your Apple Watch band, allowing you to personalize your wearable tech in a snap.
Step 1: Prep Your Apple Watch
Before diving into the band-changing adventure, make sure your Apple Watch is ready. Remove it from your wrist and position it on a tidy, level surface. This ensures you have a stable workspace to make the process hassle-free.
Step 2: Locate the Band Release Button

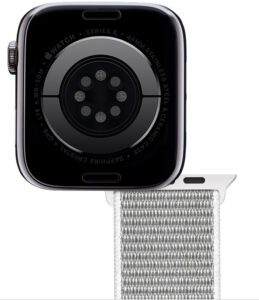
Turn your attention to the back of your Apple Watch. You’ll notice two small buttons on each side of the device, right where the band connects to the watch. These are the band release buttons. Your mission is to press and hold one of them.
Step 3: Slide and Release

While holding down the band release button, slide the current band horizontally away from the watch. You’ll feel a satisfying click, indicating that the band is released from the watch. Do the same for the other side of the band.
Step 4: Choose Your New Band
With the old band out of the way, it’s time for the exciting part – selecting your new band. Apple offers a variety of bands, from sporty options to stylish leather bands. Pick the one that suits your mood or the occasion.
Step 5: Attach the New Band
Align the new band’s connectors with the slots on your Apple Watch. You’ll notice a series of small, rounded indentations on the sides of the band – these match up with corresponding slots on the watch. Slide the new band into place until you hear a distinct click on both sides.
Step 6: Secure the Fit
Give your Apple Watch a little shake to make sure the new band is securely attached. You wouldn’t want any surprises while you’re on the move. If everything feels snug and secure, you’re good to go!
Conclusion:
And there you have it – a quick and easy guide to changing your Apple Watch band. Whether you’re switching things up for a workout, a night out, or just because, personalizing your Apple Watch has never been simpler. Enjoy rocking your stylish and comfortable new band!
